The face of an amigurumi comes from its eyes. You can add them in three ways: safety eyes that lock into place, small crocheted eyes, and eyes you embroider with yarn. Here's how to make each kind, and how to choose.
Safety eyes
Safety eyes are plastic eyes that have a post on the back, plus a washer that locks onto it from inside. Once that washer clicks on, they won't come off. You put them in before you stuff and close the piece: you have to get to the inside.
1. Push the post through
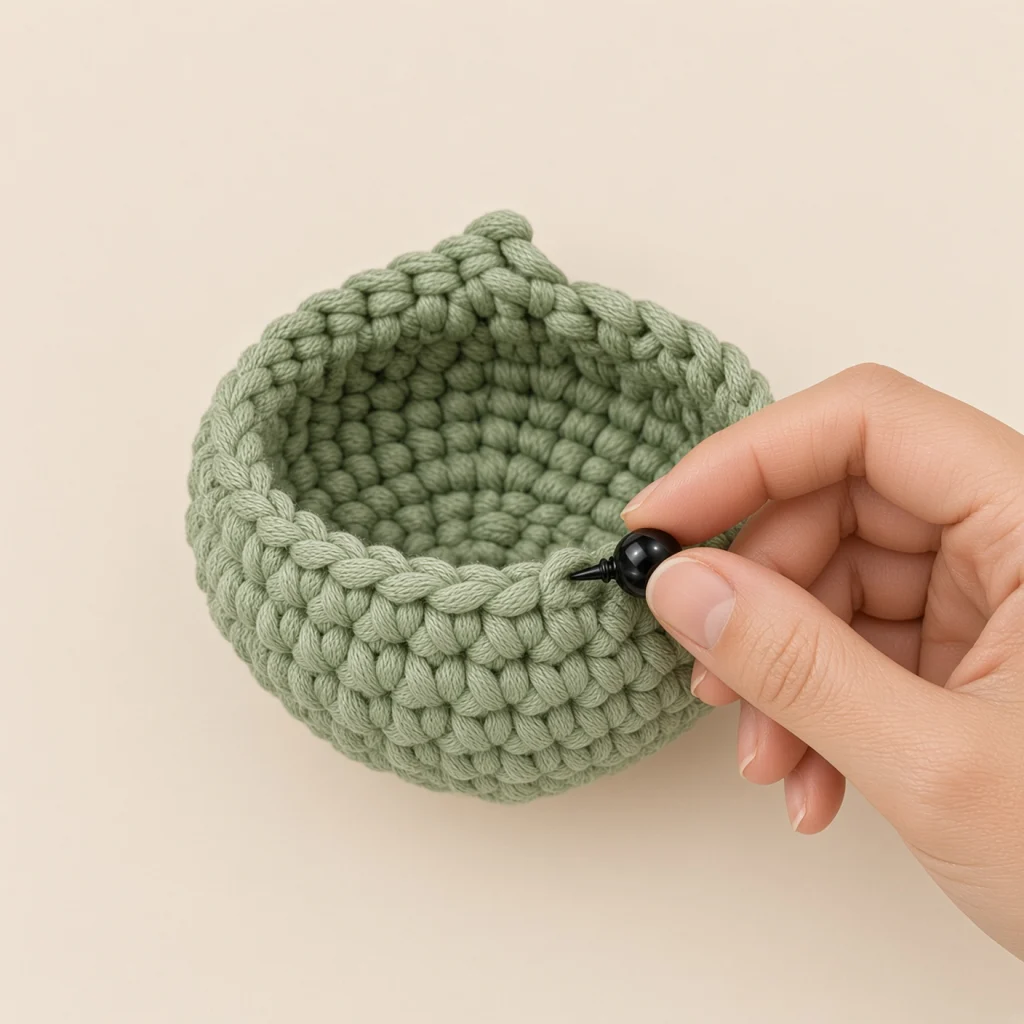
Send the eye's post in through an opening between two stitches, starting on the outside. Don't put it through a stitch, that would split the yarn.
2. Check from a distance
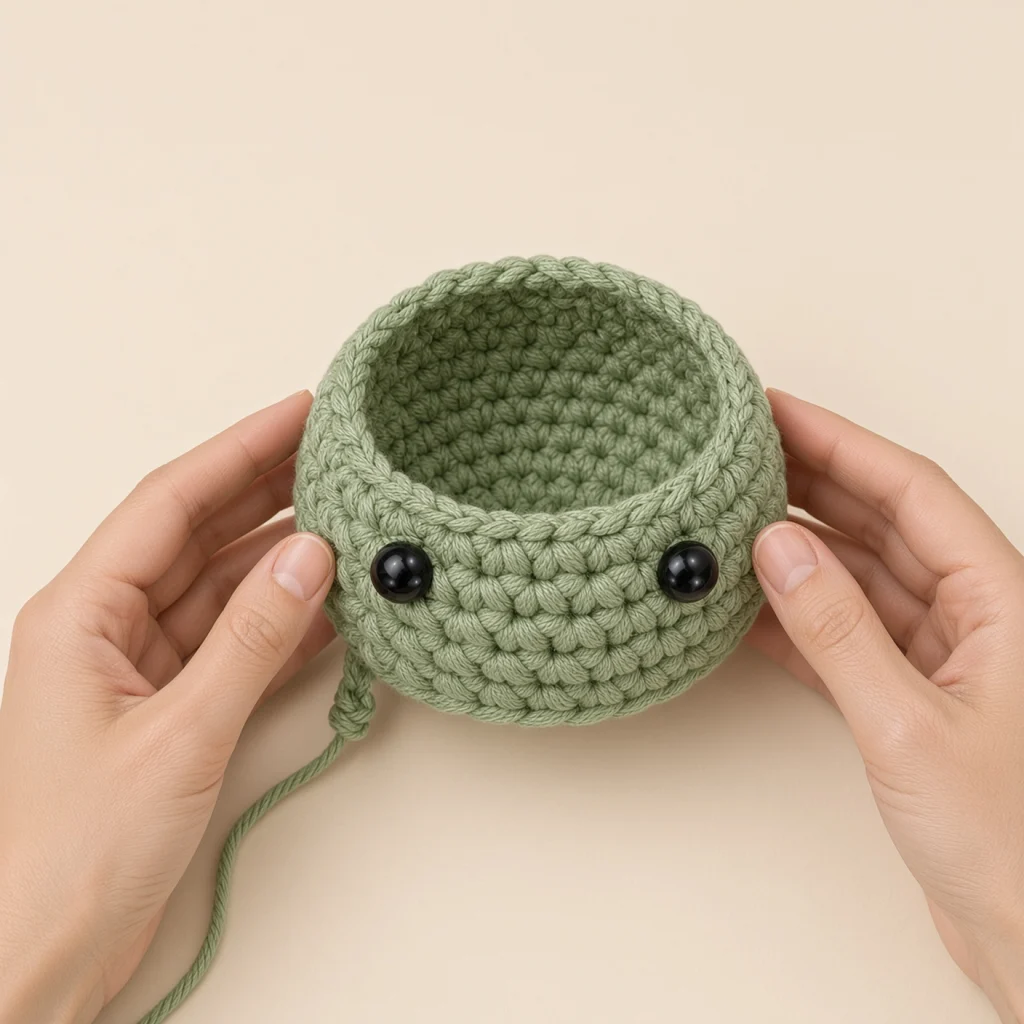
Before you lock the eyes in place, put both of them in and step back to check the face. If you want to move them, it's still simple at this point.
3. Lock them inside
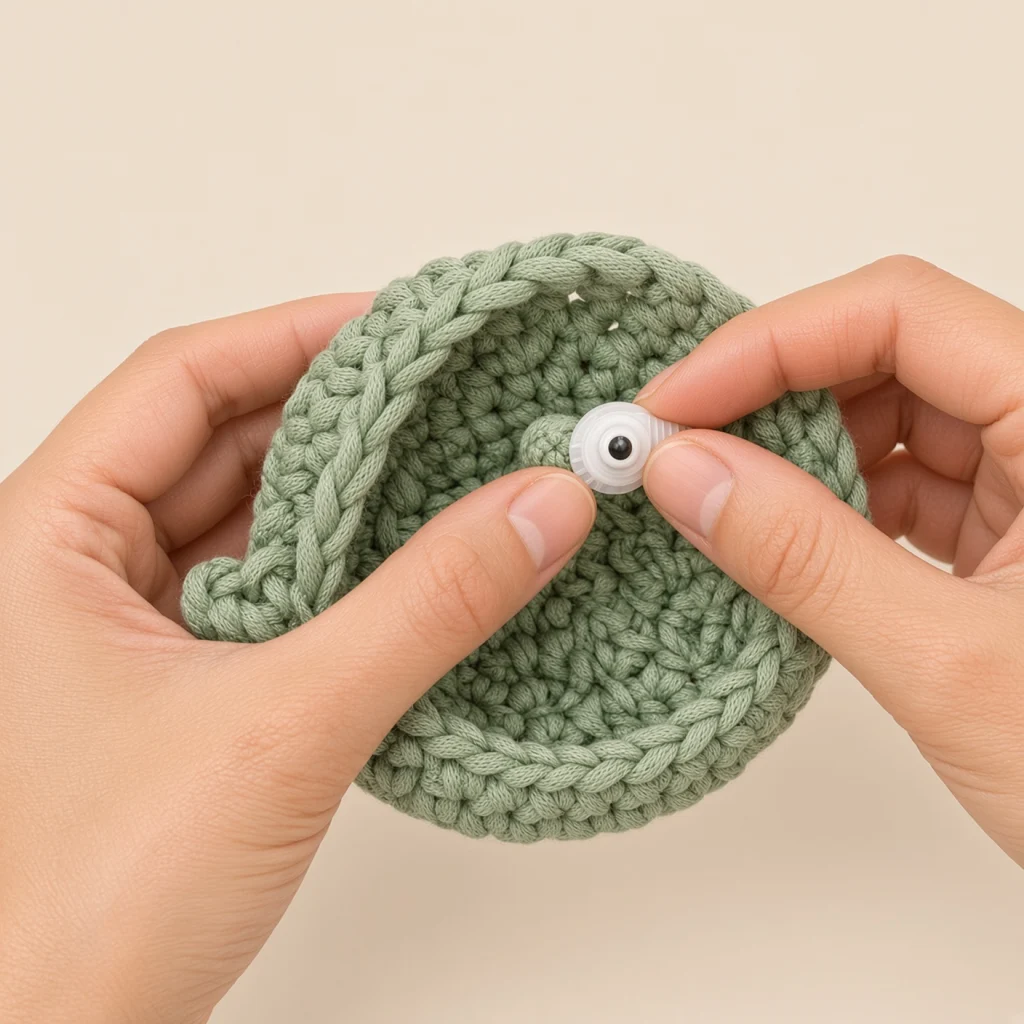
Push the washer onto the post from inside, till it clicks.
Where to put them
A pattern lets you know what rounds the eyes fall between, plus how many stitches apart they should be. Place them on the head's smoothest side, so the small jog where rounds begin lands at the back.
What size safety eyes?
That varies with the yarn, plus how large the toy is. A good place to start:
| Toy | Safety eyes |
|---|---|
| Small toys in fingering or sport yarn | 6 to 9 mm |
| Medium toys in DK or worsted yarn | 9 to 12 mm |
| Big plushies in chunky or chenille yarn | 12 to 20 mm |
Embroidered eyes, for babies
Safety eyes, along with other little pieces, might be a choking risk for kids under 3. If you're making a toy for a baby or toddler, use yarn to embroider the eyes instead. You can also embroider them after you stuff.
1. Come up where it starts
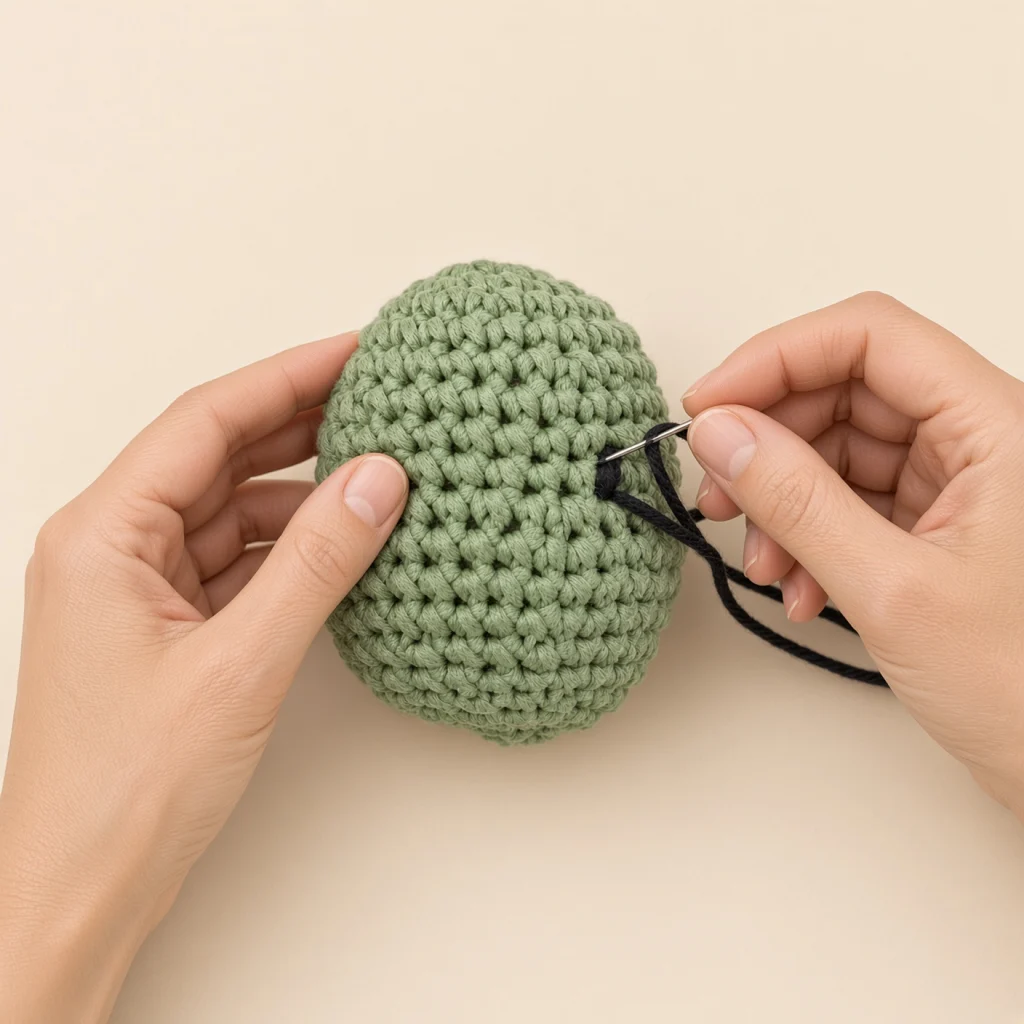
Take your yarn needle, thread it, then bring it up through the inside of the head at the spot where the eye begins.
2. Go down where it ends
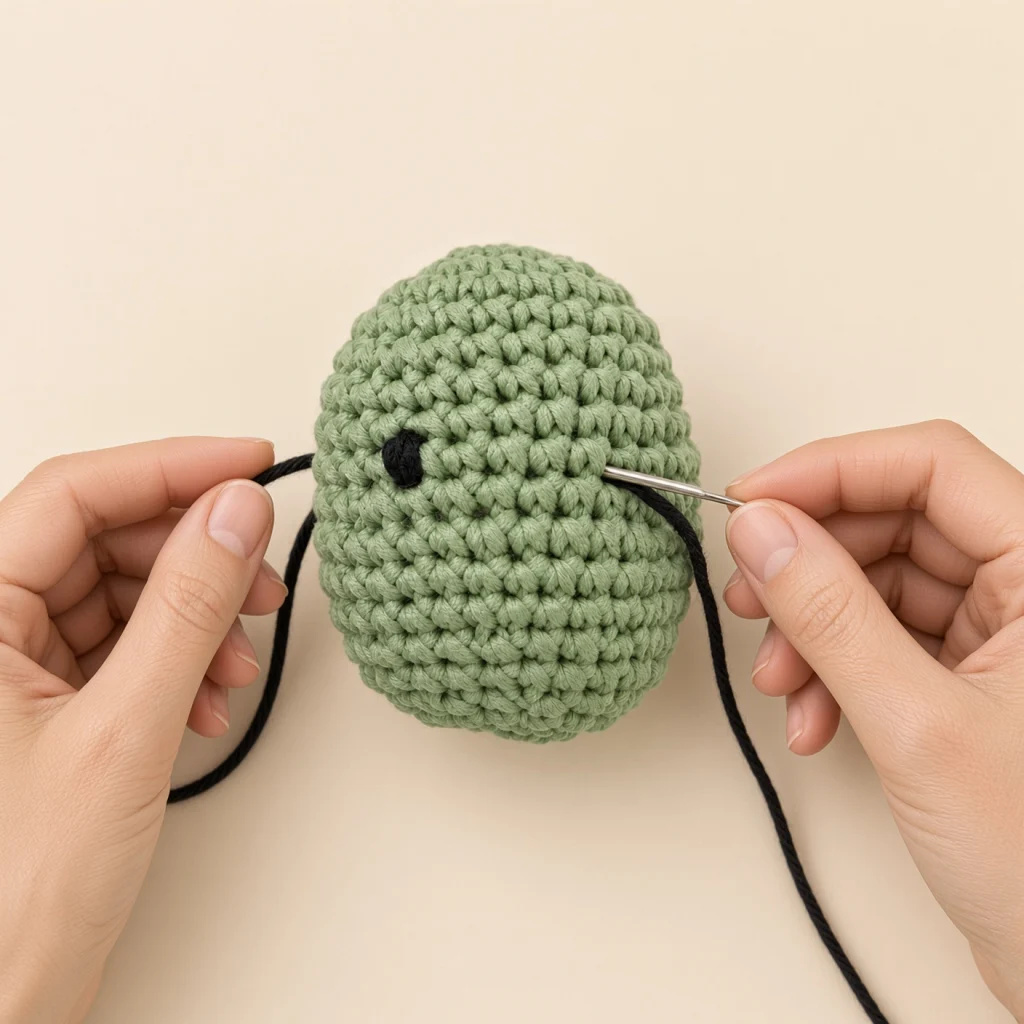
Go back in where it stops. That makes one straight stitch. Do a few next to each other for a rounder eye.
3. Shape a smile or a shine
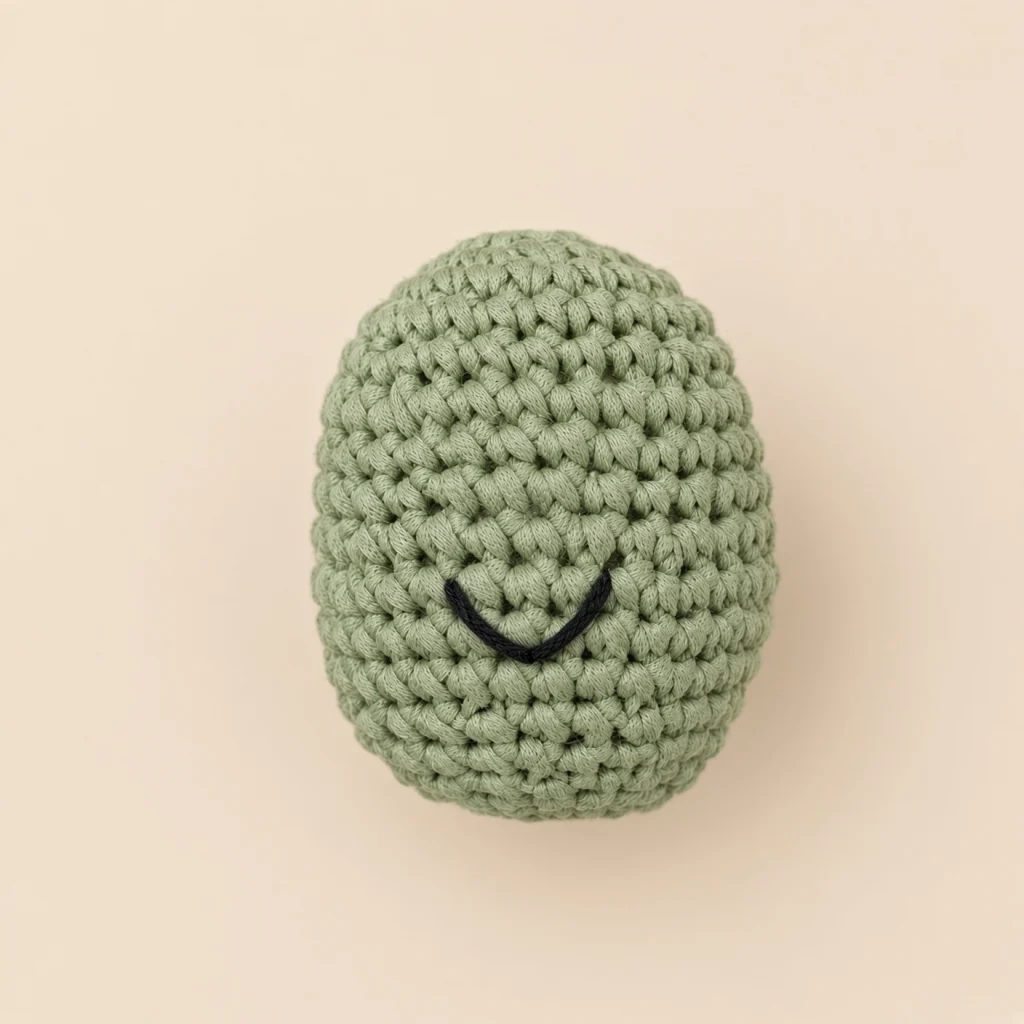
Catch the middle of a long stitch and pull it down a round to curve it into a smile. A tiny white stitch over the eye makes it shine.
Crocheted eyes
If you want larger eyes, you can crochet them: start with a magic ring of 6 single crochet in black, then slip stitch into the first stitch and fasten off, leaving a long tail. To make an eye bigger, first crochet a second round in white around it. Use the tail to sew the eye on, and put in a white stitch for the shine.
Questions
Can I add safety eyes after stuffing?
Not really: the washer has to go on from the inside. If the piece is already stuffed and closed, embroider the eyes or sew on crocheted ones.
Are safety eyes safe for babies?
No. Safety eyes and small parts can be a choking risk for kids under 3. For little ones, embroider the eyes instead.
Try it on a toy
Choose one of our free patterns and use the method, or make your own pattern from a photo of something you like.
Good patterns to practice it on:
- Frog crochet pattern (Easy)
- Owl crochet pattern (Intermediate)
- Penguin crochet pattern (Intermediate)
- Puppy dog crochet pattern (Intermediate)